
In the UK, enabling Developer Options on your Android phone is the crucial first step to unlocking its full potential, allowing for advanced customization and development work. These concealed settings provide a powerful array of tools and options for testing, debugging, and optimizing your device, but they are hidden by default. In this article, we’ll guide you on how to easily enable Developer Options on your Android phone, empowering you to delve deeper into customizing and exploring your device.
Table of Contents
What are Android Developer Options?

IPTV UK enthusiasts and tech-savvy individuals can unlock the potential of their Android devices through the hidden treasure trove known as Android Developer Options. This feature-rich toolbox caters specifically to developers and advanced users, offering a robust suite of tools for testing, debugging, and optimizing Android devices and applications.
To gain access to these powerful capabilities, users need to enable Developer Options within their device settings. Once unlocked, a world of possibilities awaits, including USB debugging, location simulation, animation speed adjustments, and more. While these options may seem unfamiliar to the average user, they hold immense value for both seasoned developers and those who crave more control over their Android experience.
It’s essential to recognize that Developer Options isn’t exclusively reserved for developers—it’s equally accessible to power users seeking to elevate their device’s performance and functionality. However, a word of caution: tinkering with certain settings can have consequences, potentially impacting the stability and overall performance of your device. Therefore, exercise prudence and only venture into these settings when you possess a solid understanding of their implications.
Read : How to Turn on Unknown Sources on Firestick and How to Find Firestick Developer Options?
How to Activate Developer Mode on Android
To activate Developer Mode on an Android device, you typically need to enable Developer Options, which contains a set of advanced settings and tools for developers. Here’s how to do it:
- 1. Open the “Settings” app on your Android device.
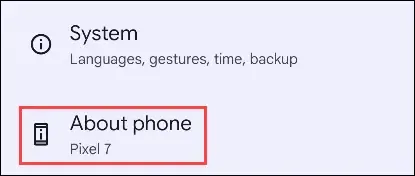
- 2. Scroll down and select “About phone” or “About tablet.” The naming may vary slightly depending on your device.
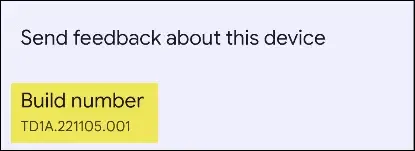
- 3. Find the “Build number” entry in the “About phone” section and tap it repeatedly (usually about seven times) in quick succession.

- 4. You will be prompted to enter your device’s PIN, pattern, or password to confirm your action.
- 5. After entering the correct PIN, pattern, or password, you’ll see a message saying that you are now a developer or that Developer Options have been enabled.
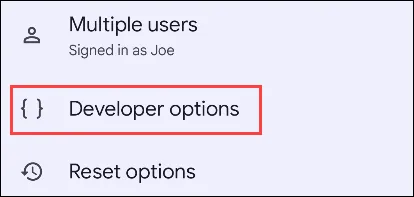
- 6. Return to the main “Settings” screen, and you will now see a new menu option called “Developer options” or “System” with a “Developer options” entry within it.
You have now successfully activated Developer Mode on your Android device, and you can access Developer Options to configure various advanced settings and tools for development and debugging purposes. Be cautious when making changes in Developer Options, as some settings can affect the performance and stability of your device.
Note: Enabling Developer Mode may vary slightly depending on the Android device and version you are using. The general steps mentioned above should work for most Android devices. If you are unable to find the “Build number” or “Developer options” in your device’s settings, try performing a quick online search specifying your device model and Android version for more specific instructions.
Remember, while Developer Mode grants you additional control and debugging capabilities, it’s essential to use these options responsibly and avoid making changes that may negatively impact your device’s performance or stability.
What Is USB Debugging on Android?
USB Debugging on Android is a developer option that allows a device to communicate with a computer running the Android Software Development Kit (SDK) or Android Studio over a USB connection. This feature is primarily used by app developers and advanced users for debugging, testing, and developing applications.
When you enable USB Debugging on your Android device, it grants the computer access to the device’s system files and allows it to send commands and data to the device.
Enabling USB Debugging empowers you to execute commands from your computer for actions that cannot be initiated directly from your phone. This functionality becomes essential when you aim to root your device, implement a custom ROM, or remotely manage your phone’s screen through your PC.
However, it’s crucial to note that enabling USB Debugging entails certain security considerations. Essentially, you’re authorizing your computer to interact with your phone, which underscores the importance of manually granting permission from your phone, as detailed below.
How to Enable USB Debugging on Android
To enable USB Debugging on an Android device, follow these steps:
- Open the “Settings” app on your Android device. You can usually find it in the app drawer or by swiping down from the top of the screen and selecting the gear icon.
- On some devices, the “Developer Options” are simply on the main screen of the Settings app. Other devices put the Developer Options in the “System” section.
- Scroll down and look for “USB Debugging” under Debugging. Enable the toggle next to it.
- When you plug your Android device into a PC with a USB cable for the first time, it will prompt you to allow USB debugging. You can tap “Allow” and select “Always allow from this computer” to never have to do it again.
- To remove computers that you’ve allowed access to your device through USB debugging, go to the Developer Options menu and select “Revoke USB Debugging Authorizations.”
USB Debugging is now enabled on your Android device. You can connect your device to a computer and use the Android Debug Bridge (ADB) or Android development tools like Android Studio to perform various development and debugging tasks. Remember to disable USB Debugging when you’re not using it for security reasons, as it grants your computer access to your device’s system files and settings.
How to deactivate developer options
To disable Developer Options on an Android device, follow these steps:
- Open the Settings: Open the “Settings” app on your Android device.
- Developer Options: Scroll down or navigate to the “System” section (the exact location may vary depending on your Android version and device manufacturer) and find “Developer options” or “System” with “Developer options” listed underneath. Tap on it to access the Developer Options menu.
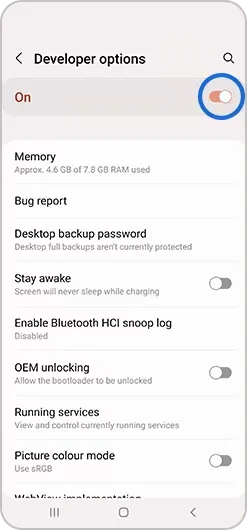
- Disable Developer Options: In the Developer Options menu, you’ll see a switch or toggle labeled “Developer options” at the top. Simply toggle this switch to the “Off” position.
- Confirmation Prompt: A confirmation prompt may appear on your screen, informing you that disabling Developer Options will reset some settings to their default values. Confirm by selecting “OK” or “Disable.”
Developer Options are now disabled on your Android device. The settings and options that were accessible through Developer Options will no longer be available.
It’s a good practice to disable Developer Options when you’re not actively using them, as some of the settings can impact the performance and security of your device, and leaving them enabled unnecessarily is not recommended.
Video: How do I Enable the Developer hidden menu?
Enable Hidden Menu “Developer Options” In Any Android Mobile Phones For Advanced Settings.
- Go to “Settings”
- Tap “About device” or “About phone”
- Tap “Software information”
- Tap “Build number” seven times. …
- Enter your pattern, PIN, or password to enable the Developer options menu.
- The “Developer options” menu will now appear in your Settings menu.
How to Turn on the Developer Options menu on a Samsung Galaxy device?
First of all, you need to know that on most Android devices, the developer options menu is hidden by default. To unhide the Developer options menu, you need to do the following steps.
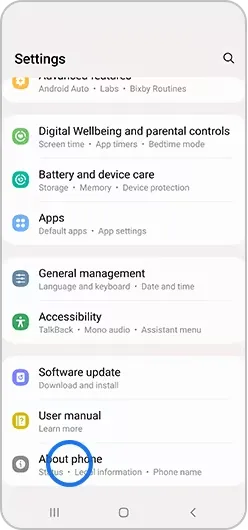
- 1. Go to Settings.
- 2. Click “About Device “or “About phone”.
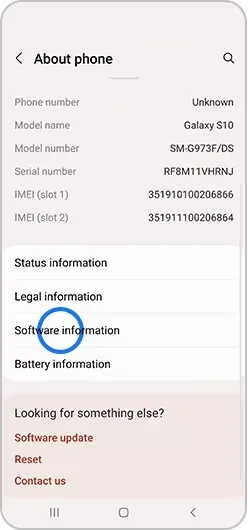
- 3. Select Software information.
- 4. Click “Build number” seven times.
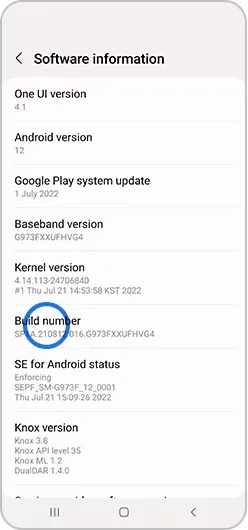
Depending on your device and operating system, you may not need to perform Step 3.
- 5. Enter your pattern, PIN, or password to enable the Developer Options menu.
- 6. Select Developer options.
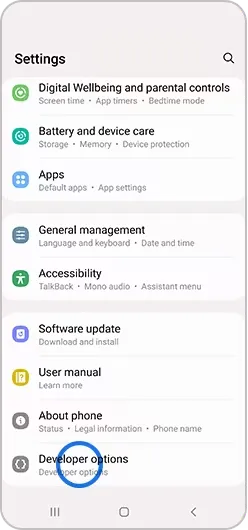
Depending on your device, it may appear under Settings > General > Developer options.
- 7. To disable the Developer options menu, tap the switch
Video: How to Turn on the Developer Options menu on Samsung Galaxy Smartphone?
How do I unlock developer options on Android 13?
If you’re curious about enabling developer options on your Android 13 device, you’ve come to the right place. In this guide, we’ll lead you to the precise location where you can activate these developer options. Let’s walk through the steps outlined below to enable developer options seamlessly:
- How to Trigger Developer Options in Android 13
- Activating Developer Options on Android 13
- Accessing Developer Settings in Android 13
- Enabling USB Debugging on Android 13
- Unlocking OEM on Android 13
Is it safe to enable developer mode in Android?
Enabling Developer mode in Android is generally safe. But it also comes with its own inherent risks and considerations. Such as:
- 1. Security risks: Be careful when accessing advanced Settings that may compromise device security.
- 2. System instability: Modifying the Settings may cause a crash or unintended consequences.
- 3. Vulnerabilities: If you abuse functions such as USB debugging, other vulnerabilities may occur.
Developer mode is for both power users and developers. So, you must disable developer mode unless necessary to maintain the security and stability of your device. If enabled, use it with caution and understand the consequences.
What Happens When You Enable Developer Options on Android?
Enabling Developer Options on an Android device unlocks additional features and capabilities designed for developers and advanced users. Enabling Developer Options brings about the following consequences:
| Developer Options on Android | Description |
|---|---|
| USB Debugging | Enables communication between your device and computer via USB, essential for app testing and debugging. |
| Developer Options Menu | Access a menu with various advanced settings not found in the standard Settings menu, including mock locations, background process limits, and GPU rendering settings. |
| Performance Tuning | Adjust performance-related settings like animation speed, transition scale, and other parameters to optimize your device’s performance. |
| Debugging Apps | Enable options such as “Show Layout Bounds,” “Profile GPU Rendering,” and “Strict Mode” to identify issues in apps and improve their efficiency. |
| System-Level Changes | Gain access to typically restricted system settings and functionalities, but use caution, as improper changes may lead to device problems. |
| Caution Required | These advanced functions should be used with care and a good understanding of their effects, as incorrect system setting changes can cause issues. Always create a backup before making changes. |
Given the potential consequences, it’s advisable to utilize these advanced functions only if you possess a good understanding of their implications. Making adjustments to your device’s system settings without adequate knowledge can result in problems or render your device inoperable. Therefore, proceed with caution and always create a backup before implementing any changes.
FAQ
What do I turn on developer options?
To enable Developer options:
1. Go to Settings > System.
2. Touch About phone.
3. Touch the Build number field 7 times. You will begin seeing a message as you 4. approach the 7 touches.
5. Touch the back arrow once complete, and the Developer options will now appear under Settings.
Is developer options good or bad for Android?
By default, enabling Developer Options will not have any immediate impact on your phone. It merely provides access to certain settings that can potentially affect your phone’s behavior, but these effects will only occur if you intentionally modify those settings. This is precisely why Developer Options are typically hidden by default on the majority of phones.
How do I enable USB debugging on Android 12?
Enabling USB-Debugging
On the Android device, open the settings.
Tap Developer Settings. The developer settings are hidden by default. …
In the Developer settings window, check USB-Debugging.
Set the USB mode of the device to Media device (MTP), which is the default setting.
How do I get developer options on Android 11?
1. To access Developer Options in Android 11, head over to Settings and tap on System.
2. Tap on Advanced to expand the list and then tap on Developer Options.
3. ou will see the entire list of Developer Options that you can play around with.
Why is my Android not showing Developer options?
Step 1: Navigate to “Settings” and select “About phone.”
Step 2: Scroll down until you reach the “Build number.”
Step 3: Tap the “Build number” entry seven times. As you tap, you’ll notice the step count decreasing until you’ve successfully unlocked the developer options.
What is the disadvantage of the developer option in Android?
Occasionally, there are instances where, despite following all the necessary steps, enabling developer mode remains elusive. It’s possible that the developer options may have been activated, but locating them can be challenging due to the intricate hierarchy of the device menu system.
Why doesn’t my Samsung have developer options?
For Android versions 4.1 and earlier, the Developer options screen is readily accessible. However, for Android 4.2 and newer versions, you need to manually enable this screen. Please be aware that on certain devices, the Developer options screen might have a different location or label. To enable it, tap the Build Number option seven times until you receive the message stating “You are now a developer!”
Is it good to enable developer option in Android?
No, enabling Developer Options won’t cause any issues with your phone or its functionality. Instead, it grants you access to various developer-centric settings, such as displaying touch positions and enabling USB debugging (commonly used for rooting). However, modifying certain settings like animation scale can potentially decrease your device’s performance.
Is it safe to enable developer mode?
No, having developer settings enabled does not pose any technical security concerns. The primary reason for their default disablement is that these settings are not essential for typical users, and some of the options can be risky if misused.
Conclusion
Enabling Developer Options on your Android phone, whether you’re a developer or a tech enthusiast, grants you more control and customization options, allowing you to better cater to your individual needs or develop applications. Understanding how to enable and utilize these options will open up endless possibilities for your Android experience. Remember to exercise caution while making changes, ensuring you understand the impact of your adjustments to avoid unintentionally affecting your device. Now that you’ve mastered the skill of enabling Developer Options, you can embark on a journey to discover the countless wonders of the Android world.


